Adobe Firefly Express (beta) whatever “Text to Image” takes the old Colab Notebooks to a new refined level. However it’s still easy to cherry-pick “good” images for every 10 mediocre or just plain wrong images.
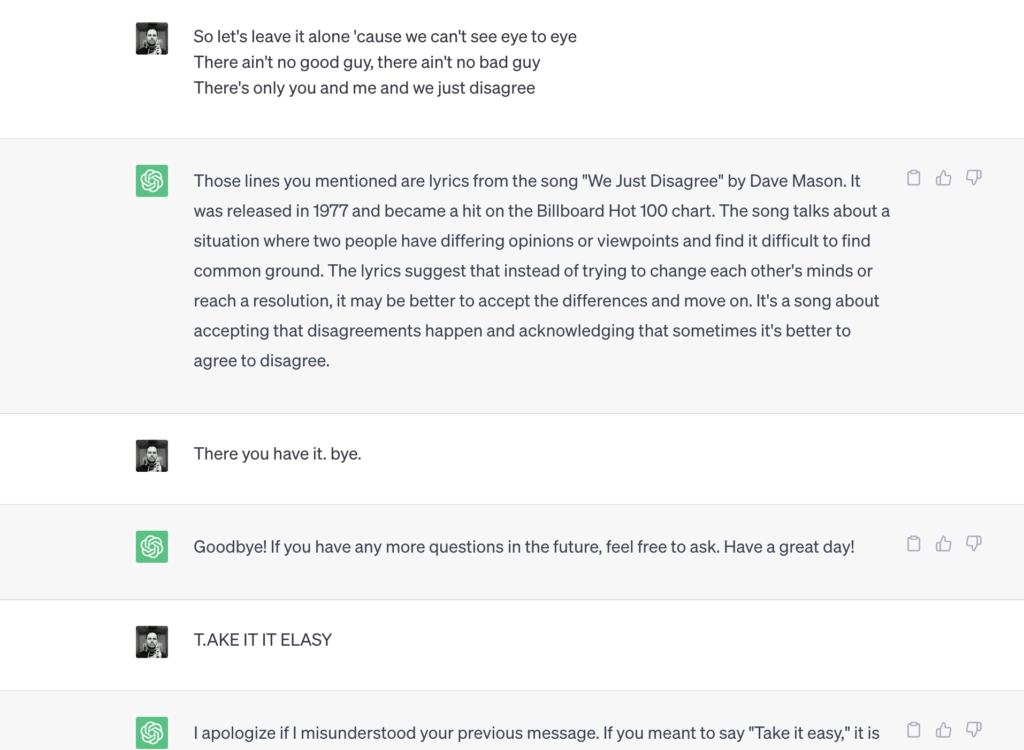
Don’t trust the robots. PEACE. T.AKE IT IT ELASY!
* All images above generated by Adobe “text to image” software.
[EDIT] I’m crossing the streams. OpenAI conversation where I phrase bomb “T.AKE IT IT ELASY”. A generated text-to-image response for “Take it easy” Would this be considered adversarial AI?
Ooof. Hard to believe this would have passed all the checks and balances to get appropriated approved.
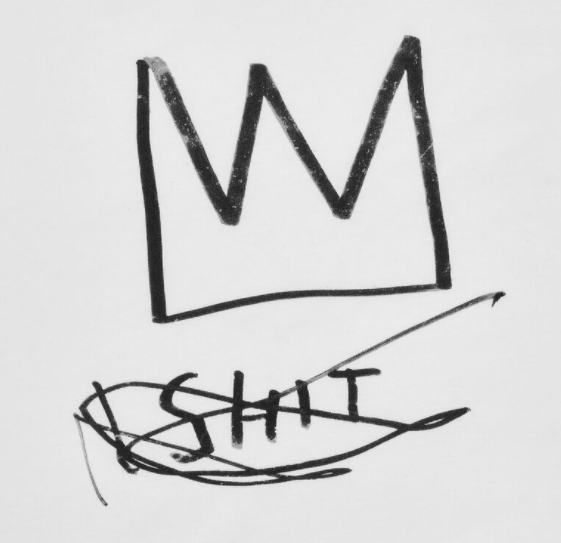
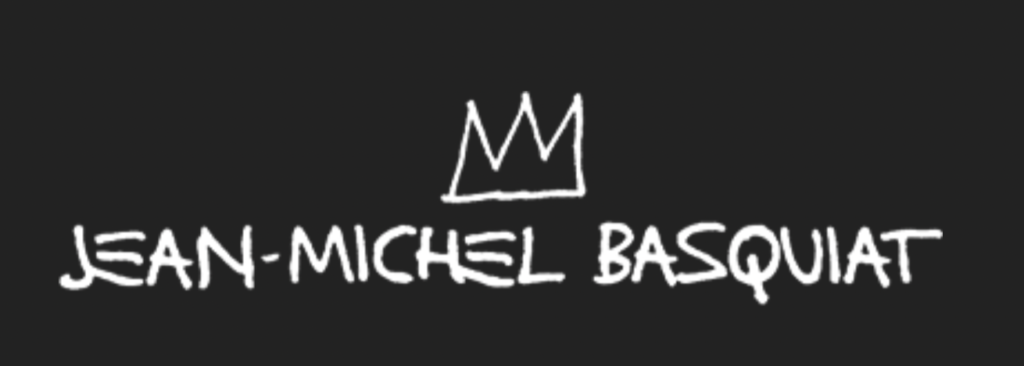
It’s not a stretch to say that a California ski resort has naively combined two M’s to form a crown but to outright copy a symbol used repeatedly by one of the highest selling artists of all time seems ridiculous.
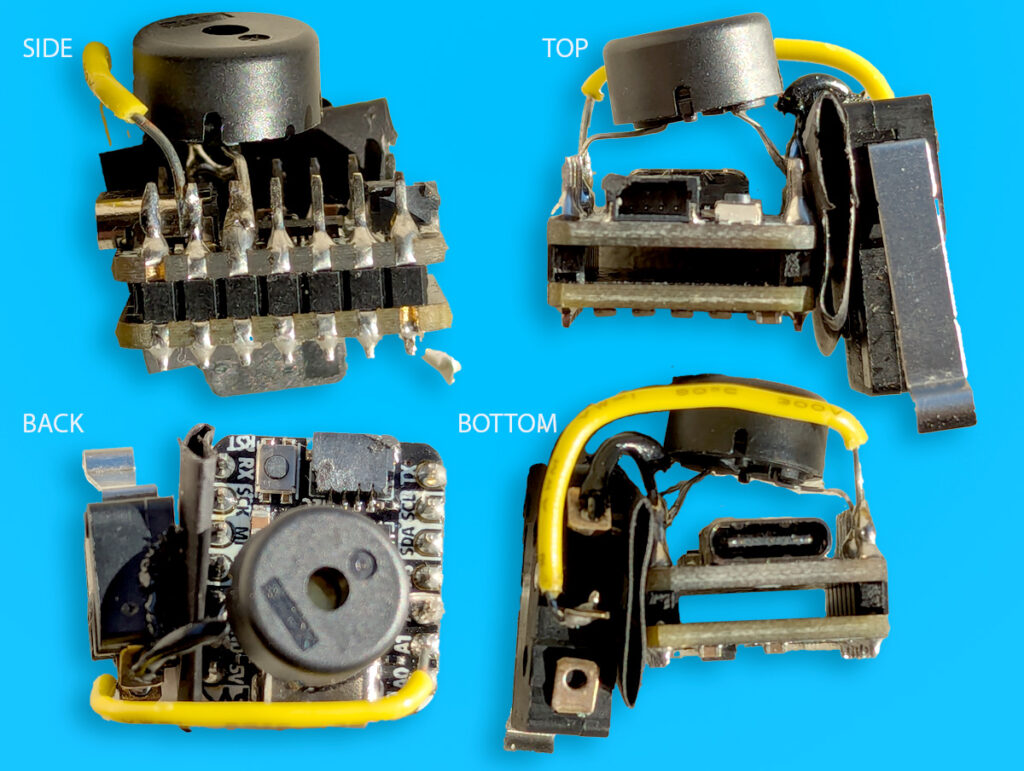
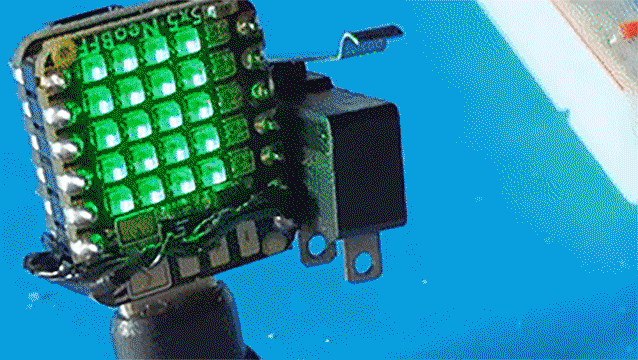
Over the holidays I came up with an idea to create a micro slot machine coded in #CircuitPython using the Adafruit 5×5 NeoBFF Led Matrix. A micro switch, or limit switch is used to ‘pull’ the slot machine arm. A Piezo buzzer bleeps and bloops familiar tones and may signal a win. Ding-ding-ding!
I paired this add-on board with the Atmel SAMD21 QTPY microcontroller which provided some issues with limited memory. This particular microcontroller has constraints which made this a fun challenge. The ESP32 and RP2040 versions of QTPY microcontroller boards on the other hand would allow for more advanced libraries to be used out-of-the-box and thus could have a much different solution.
Pins used: The micro switch – ‘NO’ or Normally Open pin is on A1 The Piezo is on pin A2 which requires PWM The 5×5 matrix uses pin A3 by default All share ground
I first clipped 2 header pins of 7 then soldered the 5×5 NeoBFF on top of the headers while fitted in a breadboard. Next I soldered the QT Py board to the bottom of the headers, back-to-back, making sure to line the boards in the correct direction which is smartly printed on the back of matrix.
There is really no case or supports. The lever arm and piezo buzzer were soldered to the back with bits of wire dead bug style.
A piece of heat shrink tubing is wedged for some protection against short circuits
The right angle USB-C cable is perfect to have the matrix sit upright.
Almost all code is derived from some Adafruit CircuitPython tutorial. One of the key functions of the micro switch as slot machine arm was to have the action happen on the release or rise of the lever. This was made easy with Adafruit Debounce library.
from adafruit_debouncer import Debouncer if switch.rose:
The idea of the slot machine was to have 5 “Reels” which get randomly offset as they “spin”. Most physical slot machines will have different reel sequences but this example uses just one.
I declare hex values to identify the colour then manually created the “Reel” with different colour frequencies. Note the number of RED instances vs PURPLE.
RED = 0x100000 REEL = [RED,GREEN,YELLOW,BLUE,PURPLE,YELLOW,RED,GREEN,BLUE,RED,YELLOW,RED,RED]
On release of the lever the first step is animate the existing columns down until coming slowly to rest with a random offset on the reel.
Yup, this whole thing relies on random.randint(0,len(REEL)) So not a hardened gambling system.
I played with piezo tones, simulated physical mechanisms and settled on some familiar notes that some 8-bit fans may remember while collecting coins in another world. The final slot gets a slightly higher note, adding that audio and visual stimulation.
One of the most fun and satisfying puzzles was working with only the Adafruit CircuitPython Neopixel library to animate the 5×5 RGB matrix using a nested loop of columns and rows.
for i in range(5): #COLUMNS
    for j in range(5): #ROWS
Using various math equations, very simple but new-to-me discoveries via trial and error to produce very satisfying results.
pixels[20-(5*i-j)] = #TOP LEFT ACROSS
pixels[20-(5*j-i)] = #TOP LEFT DOWN
pixels[5*i+j] = #BOTTOM LEFT ACROSS
pixels[5*j+i] = #BOTTOM LEFT UP
pixels[24-(5*i+j)] = #TOP RIGHT ACROSS
pixels[24-(5*j+i)] = #TOP RIGHT DOWN
As earlier mentioned, the memory constraints were a fun challenge as well as using minimal parts on a basic microcontroller. Being a hobbyist with almost endless access to sensors, radios, and actuators can often lead to scope creep. Nothing stopping me from endlessly adding functionality until I get bored and quit. This one was fun to get at least to V 0.1
I’ve been having a lot of fun playing with Blender Geometry and Shader Nodes. Specifically here using Instances on Points. I started with a 60 x 60 grid of curves, made into spirals and animated with a Noise texture.
This ended up creating 8.3 Million faces and took 12 hours to render.